LOTION BARS FOR DRY, CRACKED SKIN
Dry, winter weather causes the cracks and splits in your fingers to keep you from your daily work duties, while summer barefoot walking does the same to your heels. Lotion bars applied to the fingers and heels will take care of the painful seasonal dryness in just three ingredients: coconut oil, beeswax and shea butter.
How Does a Lotion Bar Work?
Your body’s temperature warms the bar as you apply it to the skin, and once absorbed, you’ll find that it doesn’t take nearly as much re-application as it would a pump lotion. It’s fast-acting, smooth-feeling, with the perk of relieving skin affected by eczema and psoriasis.
Do I use it with water?
No water necessary! In fact, make sure you don’t use it like you would a bar of soap. You’ll find it to be waxy with no ability to absorb into the skin. Some people prefer to rub the lotion bar over their skin after a warm shower. This works.
Watch the video to see how the lotion bar works:
What Makes Lotion Bars Work so Well?
- It is made with beeswax, so it lasts longer in the skin than regular pump lotion.
- The bar contains NO water. It’s best to leave it out of skincare products.
- No fragrances, preservatives, chemicals, colorants or additives that may irritate the skin.
- Shea butter works well on seasonal eczema and psoriasis.
- Non-messy.
- Convenient and travels well.
How Long do Lotion Bars Last?
A small (1 oz)bar can last about 2 weeks if used daily. One big benefit is that as you continually use it, your skin will become so soft, you rarely need to re-apply. As far as shelf life goes, the lotion has a 1-2 year shelf life, although it may experience some ingredient separation if left out in the heat.
Can Lotion Bars be Used for Eczema Instead of Steroids?
“Eczema is sometimes called dermatitis which means inflammation of the skin. There are different types of eczema, but most are chronic conditions. The most common type is atopic eczema.” (source)
According to the American Academy of Dermatology, an eczema treatment plan includes three steps:
- moisturize
- pinpoint triggers
- prescribe medicine
But what if you only needed to complete steps one and two to get rid of eczema? Many of our customers have reported that our Beesilk Lotion Bar has been exactly what they need to rid their skin of eczema.
Lotion Bar Recipe
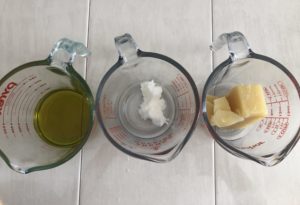
Ingredients:
- 3.5 oz beeswax (use 3 oz in the winter)
- 3 oz shea butter
- 3 oz coconut oil
Essential oils (optional)
Instructions:
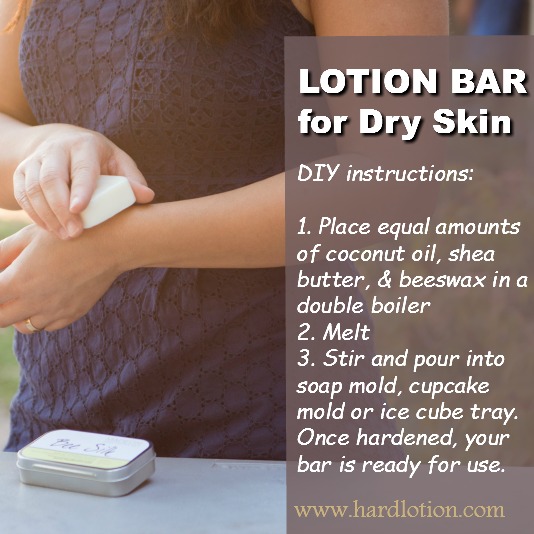
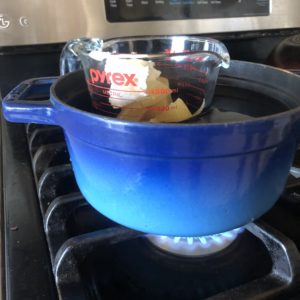
- Place beeswax, shea butter, and coconut oil in a double boiler.
- Melt and stir with a wooden skewer.
- Remove from heat, wait a few minutes and add several drops of essential oil, if desired.
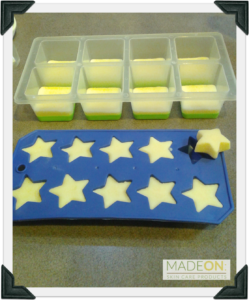
- Stir with wooden skewer and pour into molds.


Molds can be ice cube trays, round cupcake pans or chocolate/soap molds.

Once lotion bars come to room temperature, put in freezer for easy pop-out removal. It’s recommended to clean up while pots are still hot and lotion residue is melted. After pouring into molds, wipe out bowl completely using a paper towel and then wash with hot, soapy water.
To use: apply lotion bar to skin using a light rubbing motion. Lotion will absorb into skin on contact. One 2 oz bar can last up to a month. For more serious dry skin issues, apply heavily at night and feel a marked difference in your skin by the morning. For day to day use, only a small amount is necessary for immediate relief and a non-greasy feel. Store in tin and use within 1 year. No refrigeration needed.
How do I Store My Lotion Bar?
Lotion bars are best kept out of the direct sun or intense heat. Stored in a tin is what we do. You can also keep it on a plate next to your nightstand, but be aware that it could attract dust.
Frequently Asked Questions When Making Lotion
Can you add color to a lotion bar? Yes, but you don’t want to color your skin with colorant. So, how about making your own tinted lip balm? With just 4 easy ingredients, you can make your own tinted lip balm in a similar fashion as making lotion bars.
What other skincare products can I make from my kitchen? Great question! Lip balms are an easy DIY project. So is a muscle rub, bath salts, massage oil… here are some recipes: https://hardlotion.com/diy-valentines-day-skin-care/
Can I make lotion in my crockpot or Instant Pot? Yes! Here’s a post that outlines 4 methods of lotion bar making: https://hardlotion.com/4-methods-making-lotion/
Can you SHOW me how it’s done? Here’s Melissa to show you how:
What are some ways to package the finished bars?
I’ll let our customers tell you what they’ve done:
Julie: I made lotion bars in mini-muffin tins and used your gift tags. I used parchment paper for wrapping.
Tomoe: I made 15 small hard lotion bars for the first time!!!! Yay! And surprisingly it was so easy. I watched the video on your website a few weeks ago, so I have some idea of what I was getting into. But can it be this easy??? I had about 40 min until dinner. I got my two kids (2 and 4 yr old) a few pieces of paper and lots of Christmas stickers. Then I got on my project. I never dealt with beeswax before, and it took longer than expected to melt the beeswax. But once it melted, I exclaimed, “I can’t help you guys right now.” And I quickly filled up 15 cupcake cups. And while I was busy helping my little one, it was already hard!!! Wow. I hope you can feel my excitement from my email!
I wrapped each one with jumbo baking cup and sealed it with Christmas stickers that I bought for my kids ;-). And put it in a clear bag and put the tag you generously provided and tied it with red and white twine. I’m so proud of myself!!! i can’t thank you enough, Renee! I probably didn’t go with this route if I didn’t have this all! So THANK YOU!
